
XT-3D Delay is a creative delay effect. Utilizing 3 separate paths for the Left, Right, or Center(sum), you can create many different mono or stereo effects.
Best when used on: Vocals, Guitars, Drums and Keyboards.
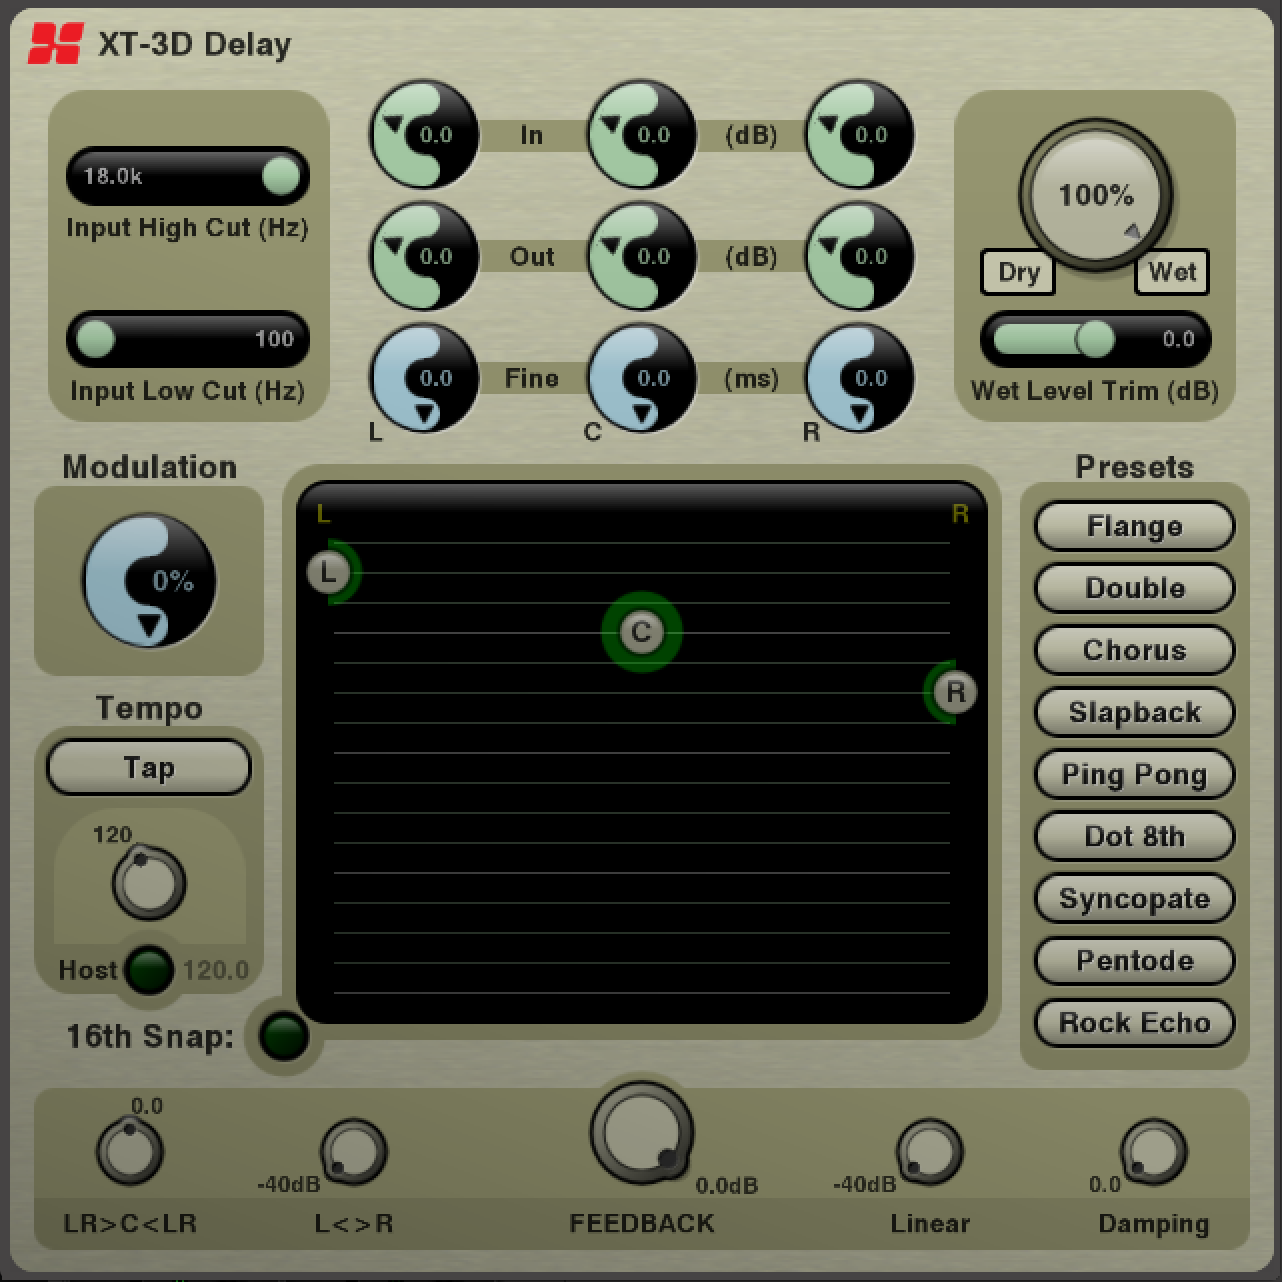
Controls:
Input High Cut: Moving this slider to the left will decrease the amount of high frequencies that are fed to the delay effect.
Input Low Cut: Moving this slider to the right will decrease the amount of low frequencies that are fed to the delay effect.
L,C,R: the effect has 3 delay paths: one dedicated for the Left, one dedicated for the Right channel, and a third channel for the Center (sum of left+right). Each channel has an In knob (the level sent to the input of this delay path), Out knob (output level of this delay path) and a Fine adjust (a small additional delay for this path, which can be modulated.)
Wet/Dry knob: Turning this knob to the left will result in a 100% Dry sound (no effect is heard). Turning the knob to the right will result in 100% Wet sound (no dry signal is heard). A momentary button for ‘Dry’ and ‘Wet’ allows you to audition the effect without permanently changing the knob setting.
Wet Level Trim: This knob adjusts the level of the “wet” signal. You can trim the effect up to +/-24dB with this slider.
Modulation: Increasing this knob will slightly modulate the path delay times. This results in a subtle flanging or pitch-modulation effect.
Tempo: The tempo may be entered by tapping the Tap button repeatedly, or adjusting the knob. If the “Host” button is engaged, then the Tap and Tempo knobs will be disabled, and the plugin will use the host’s tempo.
16th Snap: Engaging this button will lock the 3 delay icons to multiples of the tempo, when they are dragged. This makes it easier to generate beat-synced effects.
Delay Icons L, C, R: Each of the three delay paths is represented by an icon on the graph. A green signal-present indicator surrounds each icon, when the delay output has signal. Moving an icon to the left or right will pan that delay path’s output. Dragging the icon lower will result in a longer delay time.
Presets: Each of these buttons will overwrite all of the current plugin parameters to match a predefined preset. The selected presets are starting points for the most popular delay effects.
Feedback section:
The feedback section has the most dramatic effect on the effect’s decay. In many cases, you won’t need to adjust these knobs because they are selected by the Presets. But a deep knowledge of the feedback knobs will allow an experienced user to realize many sonic possibilities.
LR>C<LR: this knob adjusts the level of the left and right delayed output that is fed to the input of the center delay path. Turning the knob “left” will feed the left&right output signals into the center’s delay path. Turning the knob to the right will feed the output of the center path into the left&right paths. This knob is typically used for spatial effects and long delays.
L<>R: this knob adjusts how much of the left’s output is sent to the right delay input, and vice versa. This knob is used for ping-pong effects.
Feedback: this knob adjusts the overall level of feedback paths. Increasing the knob will reesult in more pronounced feedback effect, and may result in howling feedback. For dramatic effects, you can automate this knob to drive your effects at or near 100% feedback.
Linear: This knob affects each paths’ feedback from its input to its output. This is the most common feedback mode.
Damping: This knob defines the cutoff frequency for the feedback path. Increase the damping knob to emulate analog tape-style delays which result in successively less high-frequency content in each feedback repeat.
Post your comment on this topic.