
Click above for video instructions.
Object (Region) Editing
The basic element of audio editing in Mixbus is the Region. Another common name for a Region is a “clip”. A region represents an audio file (or a portion of an audio file) on disk. Regions can be moved, stacked, trimmed, copied, deleted, and otherwise edited. The maximum length of a region is the length of the file that it uses as a source, but it can be much shorter. A region might represent just a small segment (such as one syllable or drum hit) from the source file. Editing or deleting a Region does not change the source file in any way. This is called non-destructive editing. Audio regions can only exist on audio tracks. You cannot drop an audio region onto an audio bus, or a MIDI track. Similarly, a MIDI track can only hold MIDI regions.
Regions have several “hot spots” that can be modified using the left mouse button when in Object or Smart-Object mode. Object edits follow the Grid selection, so operations will snap to the nearest Grid location if it is turned on.
| Move | Click in the waveform area to drag the region in time or across tracks. |
|---|---|
| Start/End Trim | Near the start/end of a region, the mouse will change to a “trim” tool, allowing you to trim the start/end of the region. |
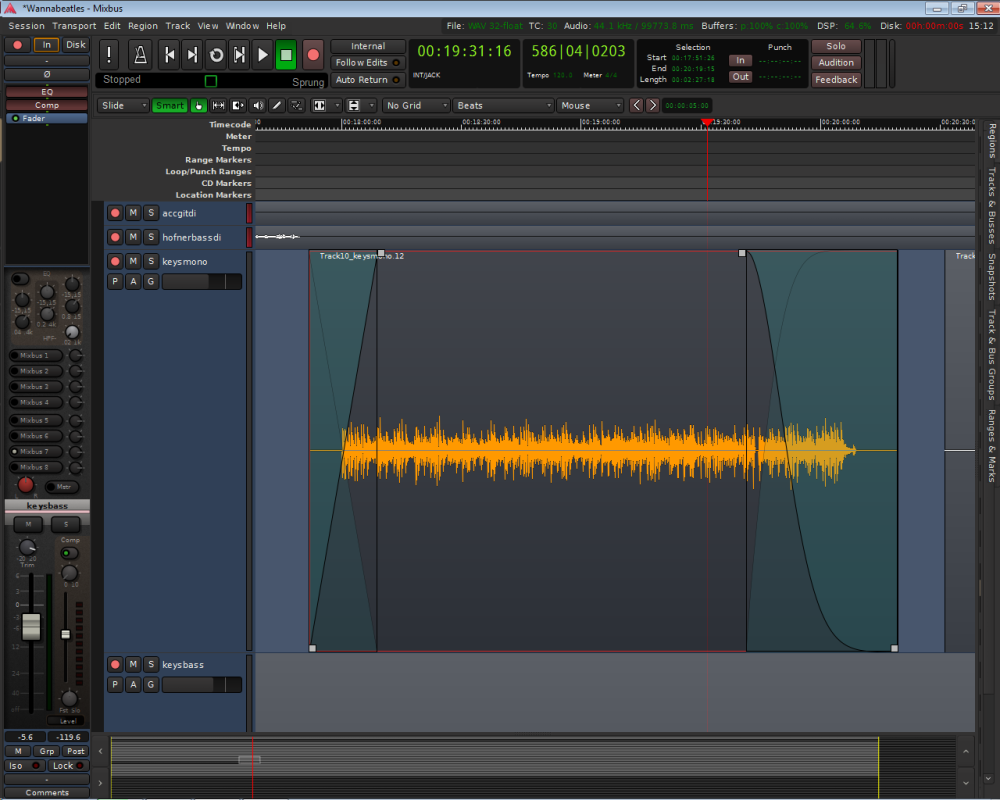
| Fade In/Out | Grab the handle in the top corner on either end to change the region’s fade. |
| Fade Length | Grab the handle in the lower corner to lengthen or shorten the region’s fade time, while leaving the endpoint of the fade fixed. |
Additional mouse commands on regions include:
| Middle-click drag | Drag the region, overriding the edit mode. If the mode is Slide, then the region will be locked in time and will only move up/down across tracks. If the edit mode is Lock, then this will override the lock and allow the region to slide side-to-side in time |
|---|---|
| Ctrl-click drag | Drag the region, while making a copy |
| Ctrl/Cmd-left-click on region start/end (slip edit) | Slide the contents of the audio file inside the region, leaving the region start and end times intact |
| right-click anywhere in a region | Open the Region Context menu (see below) |
| right-click in the crossfade area | Change the shape of the fade in/out |
For more keyboard shortcuts view Keyboard Shortcuts
Region Layers
Regions may be stacked on the same location in the timeline. This is called “layering”. Normally only the top region is heard; it covers the audio regions below it. However there are cases where the region below can be heard. One example is the top region’s fade-in or fade-out. Region fades operate as crossfades. If a region is stacked on top of another region, then the region underneath will audibly “fade out”, while the topmost region “fades in” across the length of the crossfade. The second way to hear a region below the topmost region is if the topmost region is not *opaque *(the Opaque flag can be turned off in the Region menu and/or the right-click Region context menu).
Region layering can be changed on-the-fly by the user. Try right-clicking on a region to change its layering. Layering is one way to manage multiple “takes” of a performance. Each time a track is recorded, a new region is written onto the topmost layer. But the layers underneath still exist. There are global options that define the default behavior of crossfades and layers. While the defaults are suitable for most users, understanding these options can be very important for advanced users (see Crossfade and Layer Modes in Section 26.0 Mixbus Options).
You can see the stacked “takes” by right-clicking on a track header and choosing Layers->Stacked.
Mixbus can create a loop and record stacked takes. Just define your loop range, then define a “punch” range inside it, and start rolling. Each successive recording pass will generate a layer on top of the previously recorded regions.
Audio region fades
Every Audio Region has a fade-in and fade-out. By default, the region fade is very short, and serves to de-click the transitions at the start and end of the region. By adjusting the region’s fade length, a more gradual transition can be accomplished. Important: In Mixbus, each region’s fade is a crossfade with the audio below it. In other words, if the beginning of a region overlays a region(s) below it, you will hear a gradual fade from the underlying region(s), and a fade-in of the topmost region.
You may right-click on a region’s fade-in or fade-out to choose the shape of the fade.
Deactivate: The fade is completely deactivated. The audio in the region will be heard exactly as-is.
Linear: Cuts off abruptly at lower levels. Used as a crossfade between 2 audio regions. The signals are each -6dB attenuated at the midpoint. This is the correct crossfade to use with highly-correlated signals (such as test tones) for a smooth transition. This mode is rarely used on “real” material because you will hear a distinct dip in the middle of the crossfade.
Constant Power: Used as a crossfade between 2 audio regions. The signals are each attenuated -3 dB at the midpoint. This is the correct crossfade to use when you want to smoothly fade from one sound into another.
Symmetric: This is not mathematically correct like the Equal Power or Linear curves, but it provides a slower fade-out at low volumes. This is sometimes useful when editing 2 entire music works together so that the transition is more gradual.
Slow: Normally used as a region fade-in or fade-out. This curve is similar to gradually lowering a fader. It starts very gradually but then rapidly fades to silence. It is well-suited to fading out the end of a song.
Fast: Normally used as a region fade-in or -out. The level is reduced at a constant-dB rate, so it sounds very smooth.
Region Context Menu
The region context menu (launched by right-clicking a region) has many of the same operations as the main Region menu. The Region context menu always operates on the single region that was right-clicked on, while the Region menu operates on all selected tracks. Many items in the Region Menu are self-explanatory.
Region Gain
Every region in Mixbus has a level control (called Region Gain in some menus) that applies to the whole region. The Region’s level can be modified by the Region menu, or from the right-click context menu:
- Increase/Decrease Region Gain (Increase is limited to +10 dB)
- Reset Region Gain to Unity
- Normalize (Raises or lowers gain so that the highest value in the region is 0 dBFS, limited to +10 dB max gain)
The Normalize entry will say “Denormalize” if the region is already normalized. This will return the region gain to unity.
Description of Region Properties:
- Mute
- Opaque
- Lock
- Lock to Video: this is set when a video is imported with sound. The resulting regions have the “video lock” enabled so you can’t accidentally nudge them out of time with the video. This is separate from the normal region Lock function. You must disable this lock before you can move the region on the timeline.
Region Specific Editing Options
In the picture below a particular region (called 10.4) has been selected. Notice that there are a considerable number of editing options available by right-clicking on the selected region. “Gain” as discussed above is just one of the available options. Many of these options are only available by right-clicking directly on the region and will not be displayed on the “Region” pulldown at the top of the screen, even if a particular region is selected. The same editing options are made available when right-clicking on the desired region in the Editor List which is also shown here. Notice how region 10.4 is highlighted in the Editor List when it is selected on the waveform.

In this picture the user has selected the pitch change option.
Post your comment on this topic.