
Transport Toolbar:
![]()
The Transport Toolbar resides at the top of the main window. The transport buttons (far left) are always available; many of the other elements can be shown or hidden from Preferences->Appearance->Toolbar
Transport buttons:
The transport buttons control the playhead’s location, speed and record-enable.
![]()
Transport controls are (from left to right):
MIDI Panic: Send note off and reset controller messages on all MIDI channels
Metronome: Enable/Disable audio click ( see The Click to learn more )
Start: Go to session’s Start marker
End: Go to session’s End marker
Loop playback: Plays loop range
Play: Activates “play”, starting from the current playhead location (shortcut: space bar)
Stop: Stops the transport (shortcut: space bar)
Record-enable: Toggles master record-enable ( you must also have tracks rec-enabled, to record on them )
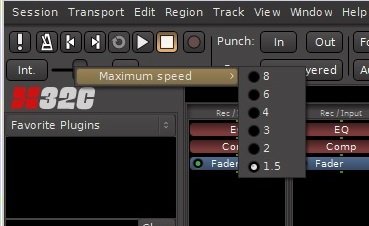
Jog/Shuttle control: Allows for increased or decreased playback speed, the slider control returns to center position when mouse is released.
Right-clicking on the slider allows adjustment of the maximum playback speed from 1.5 X to 8X of “play” speed:
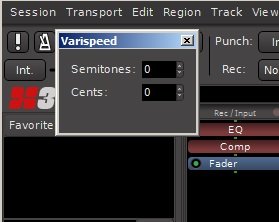
The “VS” button controls the range of the varispeed adjustment, clicking on the button allows you to set the range limits in Semitones and Cents:
To the left of the varispeed slider is Time Sync Button: This button toggles between Mixbus’s internal transport control, and synchronization to an external device ( LTC (SMPTE), MTC (MIDI Time Code), or JACK ):
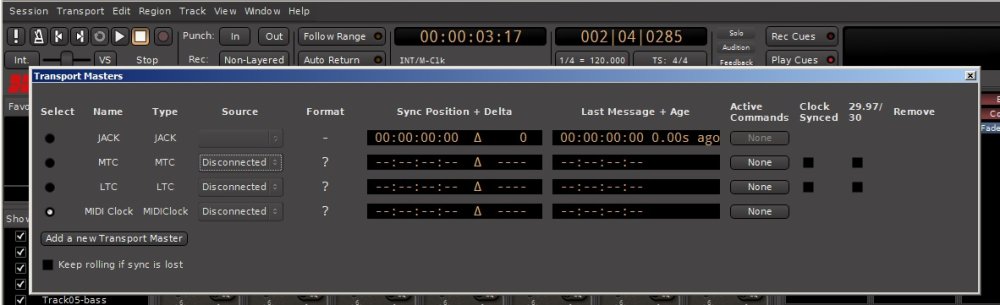
Right-clicking on the button brings up the control window which allows you to choose the source to sync the transport.
To learn more, visit: Clock Synchronization.
Record & Punch options:
To enable the “recording options” section of the toolbar, visit Preferences->Appearance->Toolbar and enable “Display Record/Punch Options”.
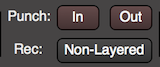
- “In” enables the punch-in marker ( see Punch Recording )
- “Out” enables the punch-out marker
- “Non-Layered” is a special recording mode: when a new region is recorded, then all of the regions that existed below that range will be removed, and the last-recorded audio will be the only region in the layer stack. See: Object Editing
Transport modes:
The Transport toolbar has 2 mode buttons which change the behavior of the playhead:
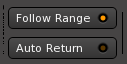
Follow Range Mode ( previously called “Follow Edits” or “Join Playhead” )
Follow Range Mode is enabled with the button right of the transport control buttons. Follow Range Mode automatically moves the playhead to follow the mouse when it is clicked on a track, and/or to allow quick auditioning of the selected time range.
Behaviors with Follow Range Mode on:
- Starting playback (with the spacebar or any other means) will play the Range selection, if there is one.
- A single click in Range (or Smart-Range) mode will locate the playhead to that location.
- When a Range selection is made, the playhead will be located to the beginning of the range.
Behaviors with Follow Range Mode off:
- Editing clicks (such as object grabs or range selections) will have no effect on the playhead location.
Auto Return Mode
- If Auto Return is on, then the playhead will always return to the location where playback started.
- If Auto Return is off, then when the playhead is stopped, it will remain in the location when “stop” was pressed.
Clocks
By default, Mixbus provides 2 clocks at the top ( Note: if your screen is small, Mixbus will automatically omit one of the clocks ). You can manually disable the secondary clock by visiting Preferences->Appearance->Toolbar

The clocks have identical operation, and each clock may operate in one of 4 different modes:
- Timecode
- Bars:Beats (musical time, or sometimes called BBT for Bars-Beats-Ticks)
- Minutes:Seconds
- Samples
To select a clock’s mode, you right-click on the clock to present the clock context menu:

- Copy contents to clipboard: copies the clock text to the clipboard, for pasting elsewhere
- Display Delta to Edit Cursor: when this is enabled, the clock will show the “difference” in time between the playhead and the mouse cursor. This is a useful tool for measuring distances on the timeline.
- Tempo and Meter selections will launch the appropriate dialog. Learn more here: Tempo, Click & Grid
Timecode Clock Mode:
![]()

In Timecode mode, the display shows timecode in Hours, Minutes, Seconds, and Frames.
Bars:Beats Clock Mode:
![BBT Clock]()

In Bars:Beats mode, the clock shows position in Bars (i.e. Measures), Beats, and Ticks. “Ticks” are sometimes called “pulses per quarter note” or PPQN, and Mixbus uses 1920 Ticks per beat.
Minutes:Seconds Clock Mode:
![BBT Clock]()
In Minutes:Seconds mode, Mixbus shows the position in “wall clock” time.
Samples Clock Mode:
![BBT Clock]()
In Samples mode, the clock simply displays the sample-offset from time 0.
Pull-up/down values are displayed underneath the Samples clock. To change the pullup/pulldown value for the session, visit Session->Properties->Timecode
Alerts

These 3 buttons will blink “red” when one of the following occurs:
- Solo will blink red when any channel or bus is Solo’ed
- This is sometimes called the “rude solo indicator”
- Click the Solo button to clear all solos in the session
- Auditioning will blink red when an “audition” is occurring
- An “audition” is when Mixbus is playing a file directly to the speakers, bypassing the mixer engine
- Auditioning can be triggered (for example) in the Import dialog, if the user chooses to audition a file before importing it.
- Click the Audition button to cancel the audition.
- Feedback will blink red when Mixbus detects a feedback loop in the mixer processing order
- Each time the transport is “stopped”, Mixbus recalculates the latency offsets and other information for the mixer engine
- If, when calculating the graph, Mixbus finds a “loop” or otherwise can’t determine the necessary latency offsets, this button will blink
- If Mixbus can’t determine the engine offsets, then it will not play audio.
- If this happens, you should consider the last few routing assignments, and consider whether you should revert one of your most-recent changes.
Selection Clock
![]()

By default, the selection clock is not shown. You can enable it in Preferences->Appearance->Toolbar.
If enabled, the “Selection clock” shows the start, end and length of the current selection. The selection clock works for a “Range” selection as well as a series of Region selections.
Mini-Timeline
![]()
The mini-timeline provides a compact and convenient way to navigate the session.

Learn more here: mini-timeline
Master bus meter
![]()

This simplified meter gives an indication of the master bus level. By default, this meter is a K-14 meter, using the same scale as the K-14 on the master bus, but shown in a different format.
You can adjust the “scale” of this meter in Preferences->Meterbridge->Default Type for Master Bus.
The vertical button on the far right will turn “red” when clip (0dBFS) is reached on the master bus. Click the button to clear the red indication.
Scripted Action Buttons
By default, the Scripted Action Buttons are not shown. You can enable them, in pairs, in Preferences->Appearance->Toolbar.
These buttons can be used to directly trigger one of:
- Actions ( anything that can be bound to a key-binding ). Select “Shortcut”, and then click “Add”. You will be prompted for which action you’d like to assign to the button.
- “Scripted actions”. Learn more in the Scripting chapter. Select from the available scripts in the menu. Some scripts even provide their own icon!
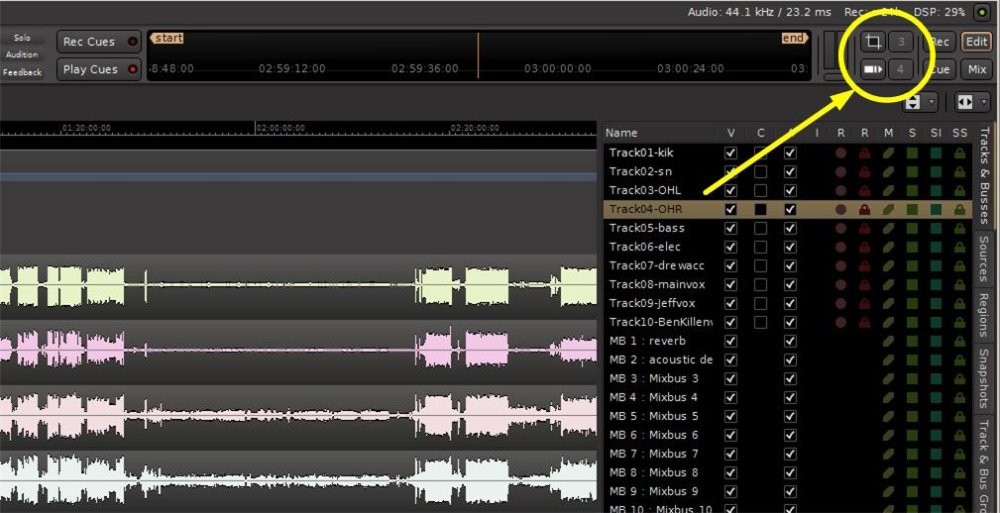
These buttons may be customized for many functions. In the picture button #1 happens to be configured to do a Mixer screen shot. Button #2 is configured to provide a quick list of the plugins currently in use. These buttons can be configured as a single-click trigger of a keyboard shortcut, as a trigger of a LUA script which you might write, and many other functions.
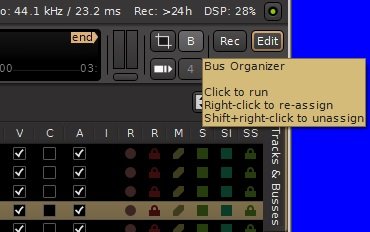
Assigning these buttons is done by right clicking. Here right-clicking was done on button #3:
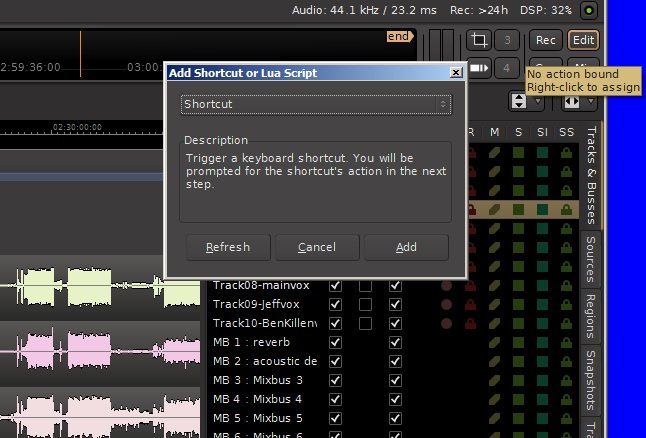
When you hover your mouse cursor over an unassigned button, the “No Action Bound” box will pop up to let you know its function is unassigned. Right clicking on the button will bring up the “Add Shortcut or LUA Script” box shown.
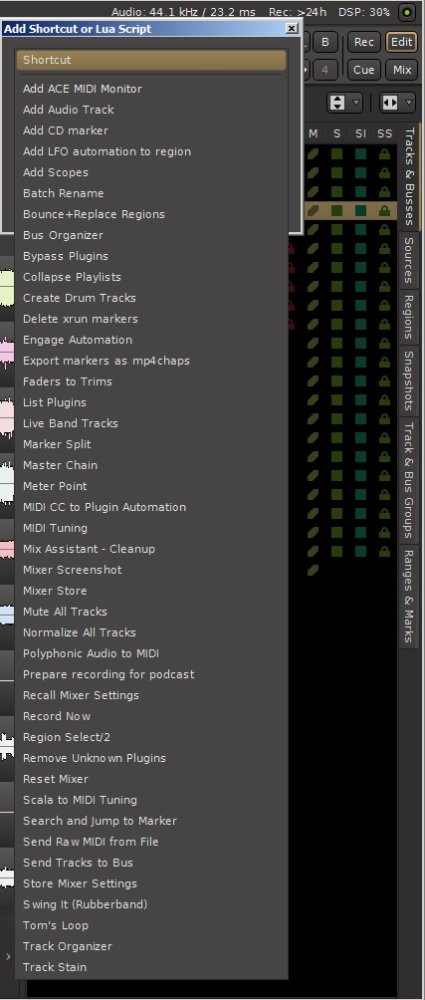
“Shortcut” is the default function in the select tab but is not the only function you can select:

If you select “Bus Organizer” for example and click on the “Add” button, button #3 will now control the Bus Organizer function:
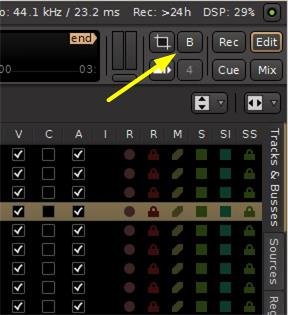
Putting the mouse cursor over the button, the popup box will tell you how to change or clear the button function:
If you select “Shortcut” and click on the “Add” button, you can select from a HUGE number of functions you can assign to this button:
Page selection buttons
These buttons are used to switch between the 4 pages of the main window – Editor, Mixer, Record and Cue pages.
You can drag these buttons to your desktop to detach any page into its own window.
You can right-click on these buttons to detach or re-attach the windows to the main page.

Post your comment on this topic.