
Basic Editing Concepts
Users familiar with other DAW conventions will quickly adapt to the recording and editing features of Mixbus.
Track Management
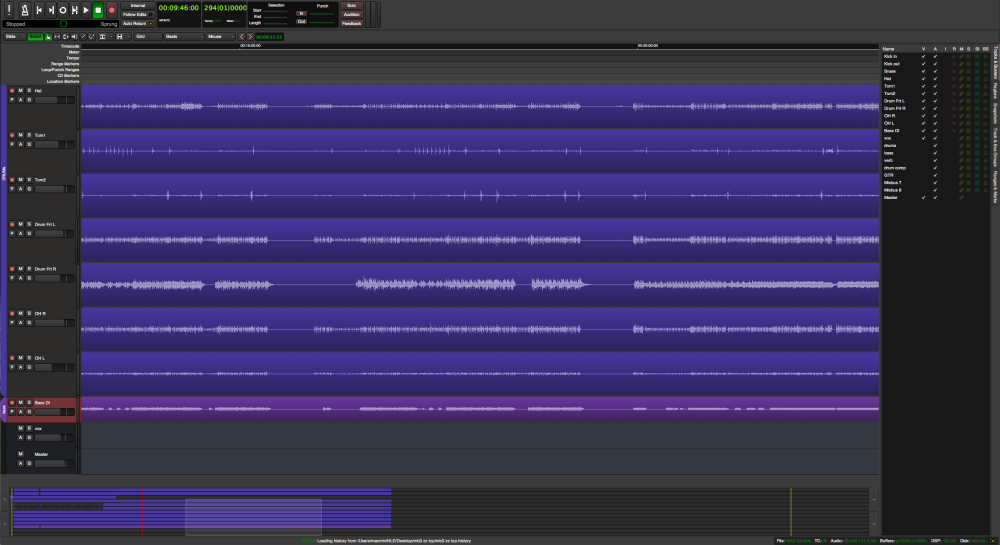
On the far left of the edit window, the Editor Mixer can be displayed via Menu>View>Show Editor Mixer. The Editor Mixer is a single mixer channel strip that “follows” the selected track. To see all of the mixer strips for the tracks and buses on one window, show the Mixer window. Alt+M ( or Ctrl+M for Mac ) toggles between the Mixer and the Editor windows. Located near the top of the mixer strip is an Input button for selection of the physical input that feeds the track. For example if you have 8 tracks but only a 2 input sound card, you must route the inputs to the tracks as-needed.
The right side of the screen is a pull-out window which accommodates several different functions. Most panels have a right-click context menu for additional features:
- Tracks/Buses – drag & drop to reorder tracks, or click to show/hide them.
- Regions – shows all of the recorded or imported regions. Drag & drop from here into the editor.
- Snapshots – Click a snapshot to recall all of the settings in the snapshot.
- Edit Groups – Click the +/- buttons to create edit groups, and enable them.
Using Tracks
To the left of the editing canvas are the track headers.
You can select or deselect a track by clicking on the empty area. You may shift-click to select a range of tracks, or Ctrl/Cmd-click to select and deselect individual tracks. Right-clicking the empty track area will open the track context menu. Certain functions such as mute, solo, and record-arm can be applied to ALL tracks simultaneously by Ctrl-Alt-Shift-clicking (Cmd-Opt- Shift-click). You can manipulate multiple tracks at once by selecting them and then using operations from the “Track” menu in the main application. Hovering the mouse near the bottom of the header causes 2 horizontal lines to appear allowing the track to be resized vertically.
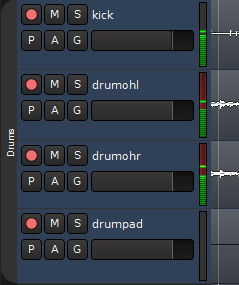
The “P” key on each track allows selection of the track’s playlist. Playlists can be used to enable multiple takes in a single track, or the sharing of playlist data across multiple tracks. Some users create a new playlist for each recording “take” while others use Layers to manage takes.
Tracks also support automation of the fader, panner, and other processing parameters including those of plug-ins. The “A” button in each track opens the automation menu which allows editing of automation data. Each parameter has multiple dynamic automation states: Manual, Play, Write, and Touch. These control whether dynamic automation will play back or be recorded while playing. Automation lines can be created and edited with the Draw Mode (green box in the image below).

You may also select a Range of automation for deletion, or to raise/lower the selected range.
Groups
Tracks may be assigned to “edit groups” using the G button. When tracks are assigned to an edit group, and the regions align exactly on the start and end times, then all changes to one track will be applied to all other tracks in the edit group, regardless of whether the grouped tracks and regions are selected for editing. This is very convenient for editing multitracked instruments. Another convenience is that some playlist operations (such as “New”) will apply across the edit group. Edit groups are created and enabled in the Mixer List to the right of the screen. To enable the Mixer List go to menu>View>Toggle Mixer List See more on Groups here.
Recording, Loops and Punch Ranges
Above the recording tracks is the “ruler bar” area (highlighted by the red box in the image below).
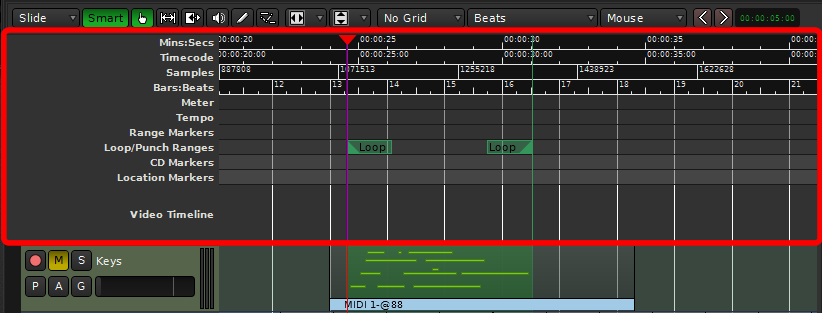
Left-click anywhere in the ruler bars to locate the playhead. You can also locate the playhead to the current mouse location with the “p” key. Right-clicking in each of the “ruler bar” areas will allow you to create location markers (cue points), CD markers, tempo markers, or meter markers. Clicking and dragging in the “range” or “loop punch” ruler bars will allow you to define song ranges, loop ranges, or punch in/out ranges. Right-clicking on the ruler bar names will allow you to show or hide the various rulers.
Navigating in the Editor window: Zooming and Panning
The area of the editor where the regions is shown is called the “canvas”. There are several ways to navigate (pan and zoom) the editor canvas.
Go to Menu>View>Zoom Focus to select the zoom focus. The “zoom focus” affects the operation of the zoom buttons and the zoom key commands by changing the focal point for the zoom.
Zoom focus can be one of:
- Left: Zoom focus is the left side of the summary view gray box.
- Right: Zoom focus is the right side of the summary view gray box.
- Center: Zoom focus is the center of the summary view gray box.
- Playhead: Zoom operations will center on the playhead.
- Mouse: Zoom operations will center on the mouse position (only makes sense when using the zoom keyboard commands; when buttons are clicked the Playhead is used as zoom focus).
- Edit Point: When the Playhead is the Edit Point, it is used for zoom focus.
In addition, there are several scroll-wheel commands that can be used to navigate the editor canvas:
- Scroll: Scrolls vertically.
- Shift+scroll: Pan the editor canvas left/right.
- Ctrl/Cmd+scroll: Increase/decrease the zoom (note: this always uses the Mouse as zoom focus).
- Alt/Option+scroll: Increase/decrease the height of the track that is currently under the mouse.
The Transport Menu and Toolbar
Many items in the Transport Menu and Toolbar are self-explanatory. For more details click here
Post your comment on this topic.